Apple Cinnamon Goat Cheese Muffins

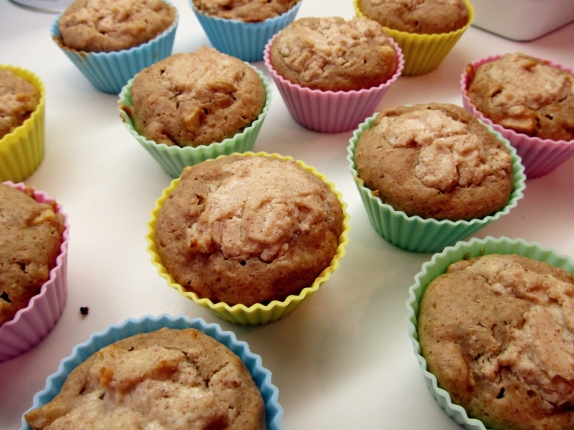
Yesterday afternoon, I received a fantastic gift in the mail….SILICONE BAKING CUPS! Best. Surprise. Ever. I’ve wanted them for a really long time and finally, someone wonderful sent them to me.

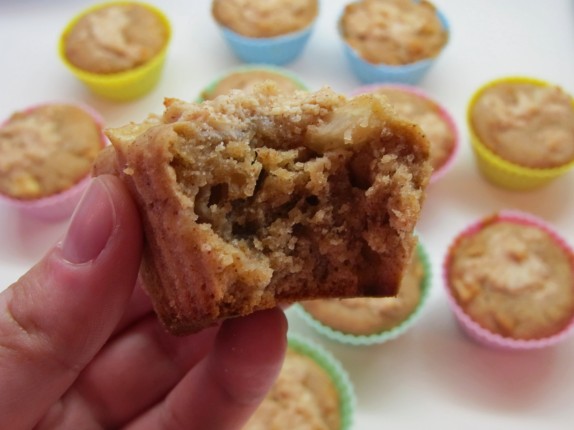
I couldn’t resist making something right away. I decided to create a variation of this delicious recipe for blueberry oat muffins. Only these are apple, and equally delicious. Perhaps even more delicious, depending on which fruit you enjoy more. They really came out beautifully. I had one for breakfast this morning and it was great.

Apple Cinnamon Goat Cheese Muffins

Ingredients:

1/2 cup quick cooking oats

1/2 cup apple juice

1 1/2 cups all-purpose flour

1/2 cup packed light brown sugar

1/4 tsp baking powder

1/2 tsp salt

1 tbs cinnamon

1/2 cup vegetable oil

1 egg

2 Granny Smith apples, diced (like a tomato)

Topping:

3 oz goat cheese

1 tbs white sugar

1/4 tsp cinnamon

1.) Preheat oven to 375 degrees F.

2.) Combine all of the dry ingredients and lightly mix. Set aside.

3.) Mix the quick cooking oats and apple juice in a large mixing bowl. Gradually beat in the dry ingredients. The batter will be crumbly at this point.

4.) Add in the vegetable oil and egg and beat until ingredients are just mixed. Stir in the apple chunks. The batter will be very thick…don’t worry!

5.) Scoop batter into a muffin tin (or cool silicone baking cups!). It should make about 12 muffins.

7.) Use a fork to mix the goat cheese, sugar and cinnamon for the topping. Once thoroughly mixed, divide equally on top of each raw muffin.

8.) Bake for 18-20 minutes.

Aren't those silicone cups adorable??

Don’t forget protection.

Occasionally, just like anyone else, I have moments of utter idiocy. One of these moments occurred on Tuesday, while watching Jeopardy. I thought it would be a great idea to make some apple chips. However, I got too excited about the final question and looked at the TV just as I sliced my thumb on the mandolin I was using. Thankfully, stitches were not necessary.

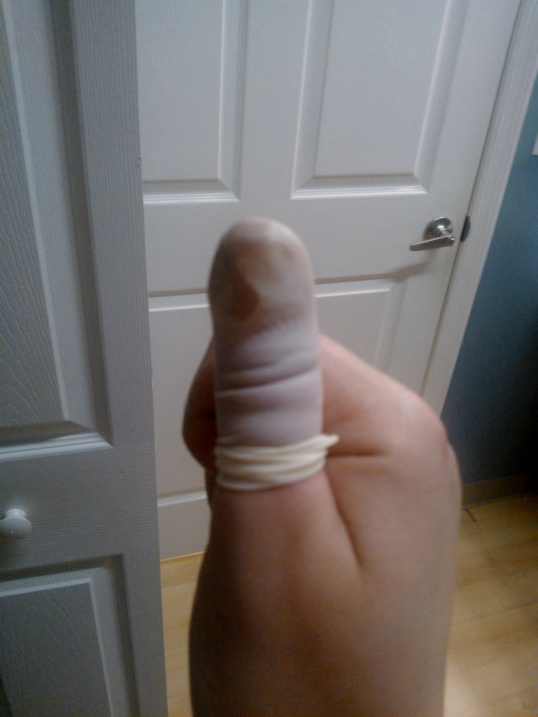
As my job requires me to work with my hands, I was slightly concerned. I do wear latex gloves, but the bandages don’t stay on due to excessive hand washing and glove changes. This proved difficult, until I found this bad boy to shield my injury:

A FINGER CONDOM! Apparently, we had a whole box and I found the last one. I suppose they are technically called “finger sleeves” but where’s the fun in that?

I don’t think I need to explicitly mention all of the uses for these things that popped into my head upon my discovery..

If I’m not mistaken, you can find these at your local Spencer’s Gifts or through a medical supply company. I pick Spencer’s, because they are sure to have better packaging.

Love Drunk Cupcakes

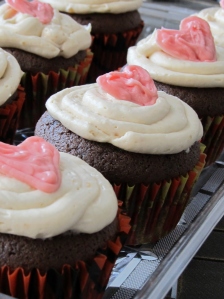
Just in time for Valentine’s Day, I put together a “lovely” little treat for you and whoever you’re spending this upcoming Tuesday with. My coworkers and family members are the ones getting to devour these awesome cupcakes this week! But of course, these cupcakes were inspired by the holiday.

If you’ve ever been in love, it gets you all jittery and excited, and sometimes you feel drunk….on love. Or maybe, you’ve just eaten these bad boys. With a kick of coffee and a spike of Bailey’s, these are sure to get you going!

Love Drunk Cupcakes

Cake Ingredients:

1 stick of butter

1/2 cup of plain greek yogurt

1 1/2 cups sugar

2 eggs

1/2 cup water

1 tsp vanilla extract

2 cups flour

1/2 cup cocoa powder

1/2 tsp salt

1 tsp baking soda

1 tsp instant coffee

***You can find the frosting recipe here.

1.) Preheat oven to 350 degrees F. Cream butter, yogurt and sugar together.

2.) Add the eggs one at a time. Mix in the water and vanilla.

3.) Gradually mix in the dry ingredients.

4.) Fill slightly greased cupcake trays about 1/3 of the way up.

5.) Bake for 16-18 minutes, or until toothpick comes out clean.

Filling Ingredients:

Use about 1/3 of the Bailey’s frosting recipe and mix in between 1/2 tsp and 1 tsp of instant coffee (depending on how strong you want the coffee flavor).

1.) After the cupcakes cool, scoop out the center with a melon baller or a teaspoon. Fill the cupcakes with the Bailey’s coffee filling.

2.) If the pieces are still intact, put the scooped out cake on top of the filling.

Frost with the rest of the Bailey’s frosting! If you want, you can melt down white chocolate, dye it red or pink, and pipe out little hearts to sit on top!

Enjoy the drunken love!


Oh, sick days. Apparently, I’d rather work.

Generally, my sick days involve endless napping and movie marathons.

Not today.

Today’s activities included the inability to sleep, talk, or move, and the switch over to WordPress. Not to mention, I finished traffic school, because I can be real dumb and ignore speed limit signs.

Anyway, here’s the new site. And now I have  a Facebook page, if you’d like to “like” me….which I know you do……

I think I’ll try to go eat some soup and NOT die now.

Here’s what I’d like to know…

For those of you who do not know, my house has been subject to some pretty dumb pranking over the last couple of months. I’m a little pissy about it, but mostly this person is just lame.

And this is the face I’m giving you, you clever little vandal, you–

You’ve GOT to be kidding me, bro-ha.

Here’s what I’d like to know:

When did it become acceptable to squirt a bottle of ketchup in someone’s mailbox as a prank? Ummm my guess is that it didn’t. Perhaps you are trying to be funny, whoever the hell you are, but its starting to get real freaking old. Spitting on car windows, our welcome mat out front, etc…

Ketchup in the mailbox? Are you for real? Firstly, that’s just messy and disgusting. Secondly, I’m sure you could think of something better…that’s not so creative. I’m sure you’re about 15 years old and think it’s cool to mess with people’s stuff, but NEWS FLASH! It’s not.

Perhaps you would enjoy it if I waited for you and dumped a whole bucket of ketchup on your head as you passed by. Or maybe spat on your bike. I’ve heard it’s the new hip thing to do. Riding around with giant lougies dried on your vehicle, I mean. Really, it’s totally fashionable.

Idiot.

Hannah’s Banana Butter Cake

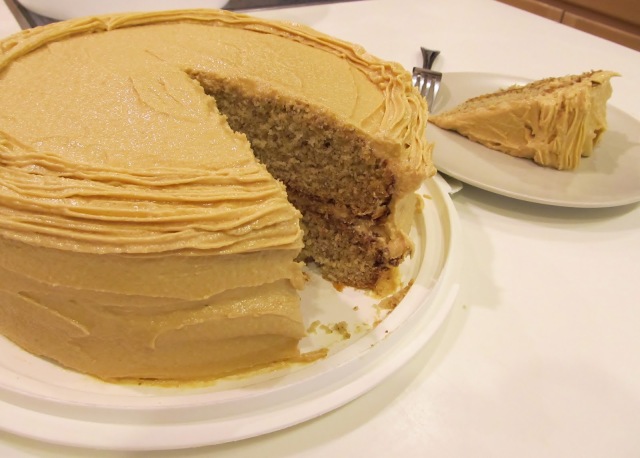
Today, I have another cakey treat. Honestly, I wasn’t quite sure this would turn out great, but let me tell you, it’s pretty darn delicious. It is a banana cake with a peanut butter cream cheese frosting. If you are allergic to nuts, keep in mind that you can use any nut-free “peanut butter” to alter this recipe.


Hannah’s Banana Butter Cake

Cake Ingredients:

1 stick butter
2 cups sugar
2 eggs
2 tsp vanilla
3 medium sized bananas
2 1/4 cups flour
1/2 tsp salt
1 tsp baking soda
3/4 cup milk

1.) Preheat oven to 350 degrees F.
2.) Cream the butter and sugar together. Add the vanilla and eggs, one at a time.

3.) Gradually slice the bananas into the mixture. Once all three have been added, mix on high until mostly smooth. Some small chunks are okay.
4.) Gradually add in the dry ingredients. When thoroughly mixed, slowly pour in the milk while the mixer is still running.
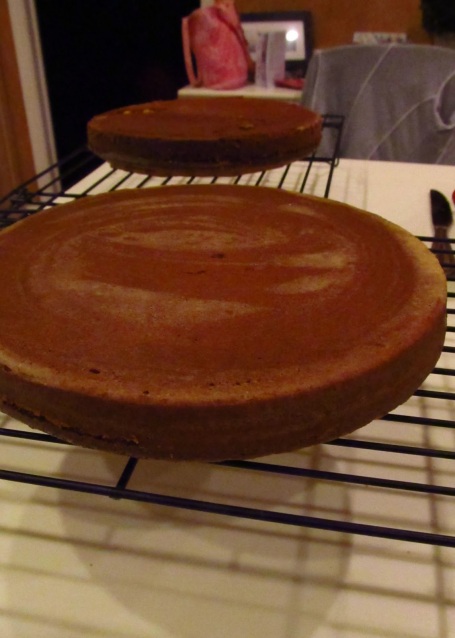
5.) Divide into two greased and floured 9 inch round pans. Bake for 29-31 minutes, or until a toothpick comes out clean.
6.) Cool on wire racks. Once the layers are completely cooled, the cake can be frosted and refrigerated, if you are into cold cake, like I am.

Frosting Ingredients:

1 stick butter
1/3 cup cream cheese
1 cup peanut butter
2/3 cup sugar
dash of salt

1.) Cream the butter and cream cheese together.

2.) Add in remaining ingredients and mix on high for approximately 8 minutes.

3.) Frost and enjoy!

I’m slacking. Sorry. I guess I’ll give you chocolate cake.

Basically, I think about posting every night, and when I get home, I forget to do it. I guess I’m still trying to organize my life. I was productive last week, at least! I got a whole meal’s worth of cooking done for my book…which is awesome! I have some tweaking to do, but I think it turned out just fine.

Since I made you wait entirely too long, I will thank you with a delicious chocolate cake recipe. It has thin, dense, chocolatey layers, and a truly delicious frosting. And I call it…

The Devil Drinks Baileys

Cake Ingredients:
1/2 lb (2 sticks) butter
2 tbs sour cream
2 eggs
1 tsp vanilla
1 cup sugar
1 1/2 cups cake flour
1/2 cup cocoa powder
1/2 tsp salt
3/4 cup water

Bailey’s Buttercream Frosting Ingredients:
5 tbs flour
1/2 cup Bailey’s Irish Creme
1/2 cup milk
1 stick butter
1 cup sugar
1/2 cup shortening
2 tsp vanilla
Dash of salt

1.) Preheat oven to 350 degrees F.
2.) Combine flour, cocoa and salt. Set aside.
3.) Cream the butter with the sour cream. Add in eggs one at a time.
4.) Mix the vanilla and sugar in. Beat until creamy.
5.) Gradually mix in the flour, cocoa, and salt mixture.
6.) Stir in the water.
7.) Divide batter into two greased and floured 8 inch round cake pans. Bake for 22-25 minutes, or until a toothpick comes out clean. Cool on wire racks.

While your cake is baking, start the frosting:

1.) Combine flour, Bailey’s Irish Cream, and milk in a small saucepan. I find that it is best to add the liquids gradually, so that the flour does not clump together. Whisk over medium heat until thick enough to come out of the pot without leaving residue.
2.) Cool mixture in the refrigerator for at least an hour, maybe two. It should not be any warmer than room temperature.
3.) Once the mixture has completely cooled, cream the butter, sugar, and shortening until thoroughly mixed.
4.) Add flour/Bailey’s/milk mixture, vanilla and salt. Mix on medium for 10 minutes.

Now you can frost your cake and serve. I like to serve mine chilled, but it’s fine at any temperature.

Okay, okay. I’m back.

I know how worried you’ve been. It’s been almost a month since my last post, and I’m sure you’ve waiting patiently for this to finally come. Or perhaps you didn’t notice, which is probably more like it, unless you are my Facebook friend and have noticed the decline in post updates. Either way, it doesn’t really matter…because I’m back!

Anyway, the reasons for my hiatus were the holidays, having visitors, getting sick several times, and lack of creative energy due to starting a new job. Now that I’m settled with everything, I can continue my random blogging, with a slight emphasis on recipes.

BREAKING NEWS! I’m writing a cook book. It’s going to be a fabulous collection of cultural deliciousness. Basically, I can’t tell you much more than that, because it’s a big secret and you will only be getting small glimpses of it, as I want you to buy it and not just learn everything off of here. But it’s going to be really exciting! Promises.

But today, we have a little something I put together for dinner tonight:

Perciatelli in a Pepper Cream sauce

Ingredients:
1 lb of perciatelli (a thick, spaghetti-like pasta with a hollow center)
1 tbs extra virgin olive oil
1 chopped onion
2 cloves minced garlic
2 cup milk
2/3 cup finely grated pecorino romano cheese
About 1 teaspoon ground black pepper

1.) Bring a large pot of water to a boil and cook perciatelli for 11 minutes.
2.) While the pasta cooks, brown the garlic and onions in the olive oil. Use a large pan, as you will be adding the pasta into it.
3.) Add the milk and cheese and whisk together until the sauce begins to boil. When it starts to thicken, add in the pepper (adjust according to how much of a peppery kick you would like) and the cooked pasta. Mix until pasta is thoroughly coated.

I chose to pair this with a caprese salad, which is just sliced tomatoes topped with mozzarella and basil, and drizzled with olive oil and balsamic vinegar or glaze.

This is a weird Christmas, kids.

Today has been full of Christmas-ey things. My day began by dressing my 2 year old nephew in a suit and taking him to his preschool Christmas concert. Little kids are adorable singing anything, but I just couldn’t contain my laughter at the song that one of the classes sang.

J-E-S-U-S

Like B-I-N-G-O.

But about a Holy baby instead of a farmer with a dog.

Serious.

Then, I stumbled upon this awesome light display. I want to meet these people.

Jammy Jams.

After receiving this lovely plate of Christmas cookies from our neighbor,

I realized that I had not posted my homemade jams! So here we go, finally.

I made strawberry and blueberry jams, and a tangerine marmalade. I am going to use these jams to fill my croissants on Christmas morning. You can too!

This will be kind of a long post, but that’s okay. Jams are pretty easy, when it comes down to it. I made recipes for one to two jars (blueberry and strawberry make one, while the tangerine marmalade makes two). Make sure you sanitize your canning jars, which you can easily find in a grocery store, before making your jams.

Blueberry Jam

2 packs of blueberries
1 3/4 cups sugar
juice of 1 whole lemon
1/2 packet of Certo liquid pectin (it’s a Kraft product and can be found in your grocery store)

1.) Combine the blueberries, sugar and lemon juice in a pot and bring to a boil. Mash the blueberries as they cook.

2.) Add in the pectin and boil for about 10 minutes.
3.) Skim off the foam with a spoon.
4.) Ladle the hot jam into the jar, and seal.
5.) Submerge the jar in boiling water for 5 minutes. It’s easiest if you have the proper tongs for this, but if you don’t, I’m sure you can find a way to get the jar out without burning all of the skin off your hands.

6.) Set can aside to cool. The jam will be ready to eat the next day!

Strawberry Jam

2 cups of strawberries
3 cups of sugar
1tbs of lemon juice
1/2 packet of Certo liquid pectin

1.) This is the exact process of the blueberry jam, sub strawberries, so I’m not going to type all that out again. I think you can figure out what to do.

Tangerine Marmalade

This one is a bit different so I will type is all out. It can take up to 2 weeks to set, so plan accordingly!

5 tangerines (if you prefer orange, you can sub 3 oranges in place of the tangerines)
2 lemons
1 cup of water
1/4 tsp of baking soda
2 cups of sugar
1 packet of Certo liquid pectin

1.) Peel the rinds off of the tangerines and lemons using either a knife or a carrot peeler, whichever you find easiest. Set aside.

2.) Cut up the fruit and remove all of the seeds.  Set aside.

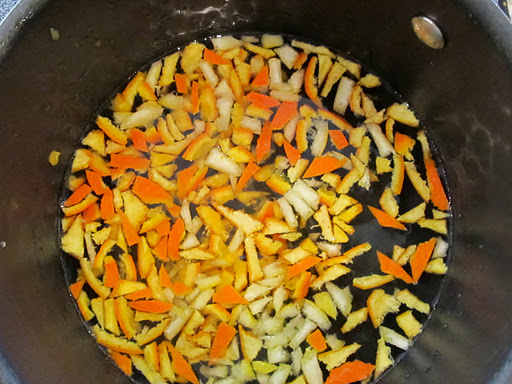
3.) Combine water and baking soda in a pot. Cut small slices of the rinds into the water. You can decide how much you want to put in, depending on how chunky you would like your marmalade to be.

4.) Bring to a boil, then cover and simmer for 20 minutes.
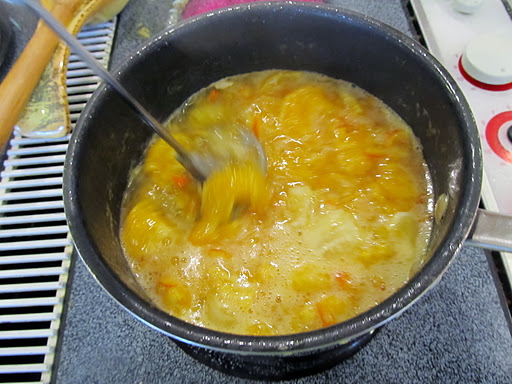
5.) Add fruit, and simmer for another 20 minutes.
6.) Add in pectin and bring to a boil for 10 minutes.

7.) If you want to, you can strain some of the chunks out. Spoon the marmalade into jars, seal, and submerge in boiling water for 5 minutes. Allow to cool and set. As I mentioned before, the setting process can take up to two weeks.
Now you have three lovely spreads for your toast, croissants, or whatever else you like to eat with jam!